
I paired up with Voltaic Systems to create a cellular, solar-powered water quality monitor. For phase one one of the project, I configured an Adafruit FONA to a water temperature probe and publishes the results to Adafruit I/O every 20 minutes. In phase 2, I will add a dissolved oxygen sensor and deploy the system near the East River to help monitor the health of the water. Our goal is to show how to use off the shelf components to monitor and share environmental data – citizen sensing.
Device’s datafeed is here (work in progress, system isn’t connected at the moment).
Arduino code for device is here.
Due to this device’s off-grid nature, I focused on power drain and creating a robust startup sequence. Once installed, it should run for a long time.
Hardware
- Voltaic Systems 3.5 Watt solar panel [3.5W, 6V] or 3 x 2 Watt panels [2.0W, 6V]
- Voltaic Systems V15 LiPo battery pack [4,000 mAh, 5V output] with Always On
- Adafruit Feather 32u4 FONA board [ATmega32u4 microcontroller & SIM800H wireless module] (link)
- LiPo battery pack [1,200 mAh, 3.7 V output] (link)
- Antenna with uFL connector (link)
- Atlas Scientific temperature probe (link)
- Ting SIM card (link)

Device’s hardware connections
The small solar panel charges the V15 Battery Pack, which then powers the Feather’s main circuitry. Set the Voltaic battery to Always On mode to keep the supply active. This battery also recharges the smaller battery, which is a dedicated power source for the Feather’s wireless communication circuitry. Adafruit recommends keeping the spare LiPo. Link the antenna to the board via uFL connector and insert the SIM card into the Feather’s wireless module after activating cell network service.
This Atlas Scientific temperature sensor was selected because it’s designed to be submersible in saltwater and is also neighbors to Voltaic in Brooklyn. It’s wired such that periodically toggling a GPIO pin can power up the sensor (minimum of 3.1V is required) for an ADC pin to read the sensor’s analog input.
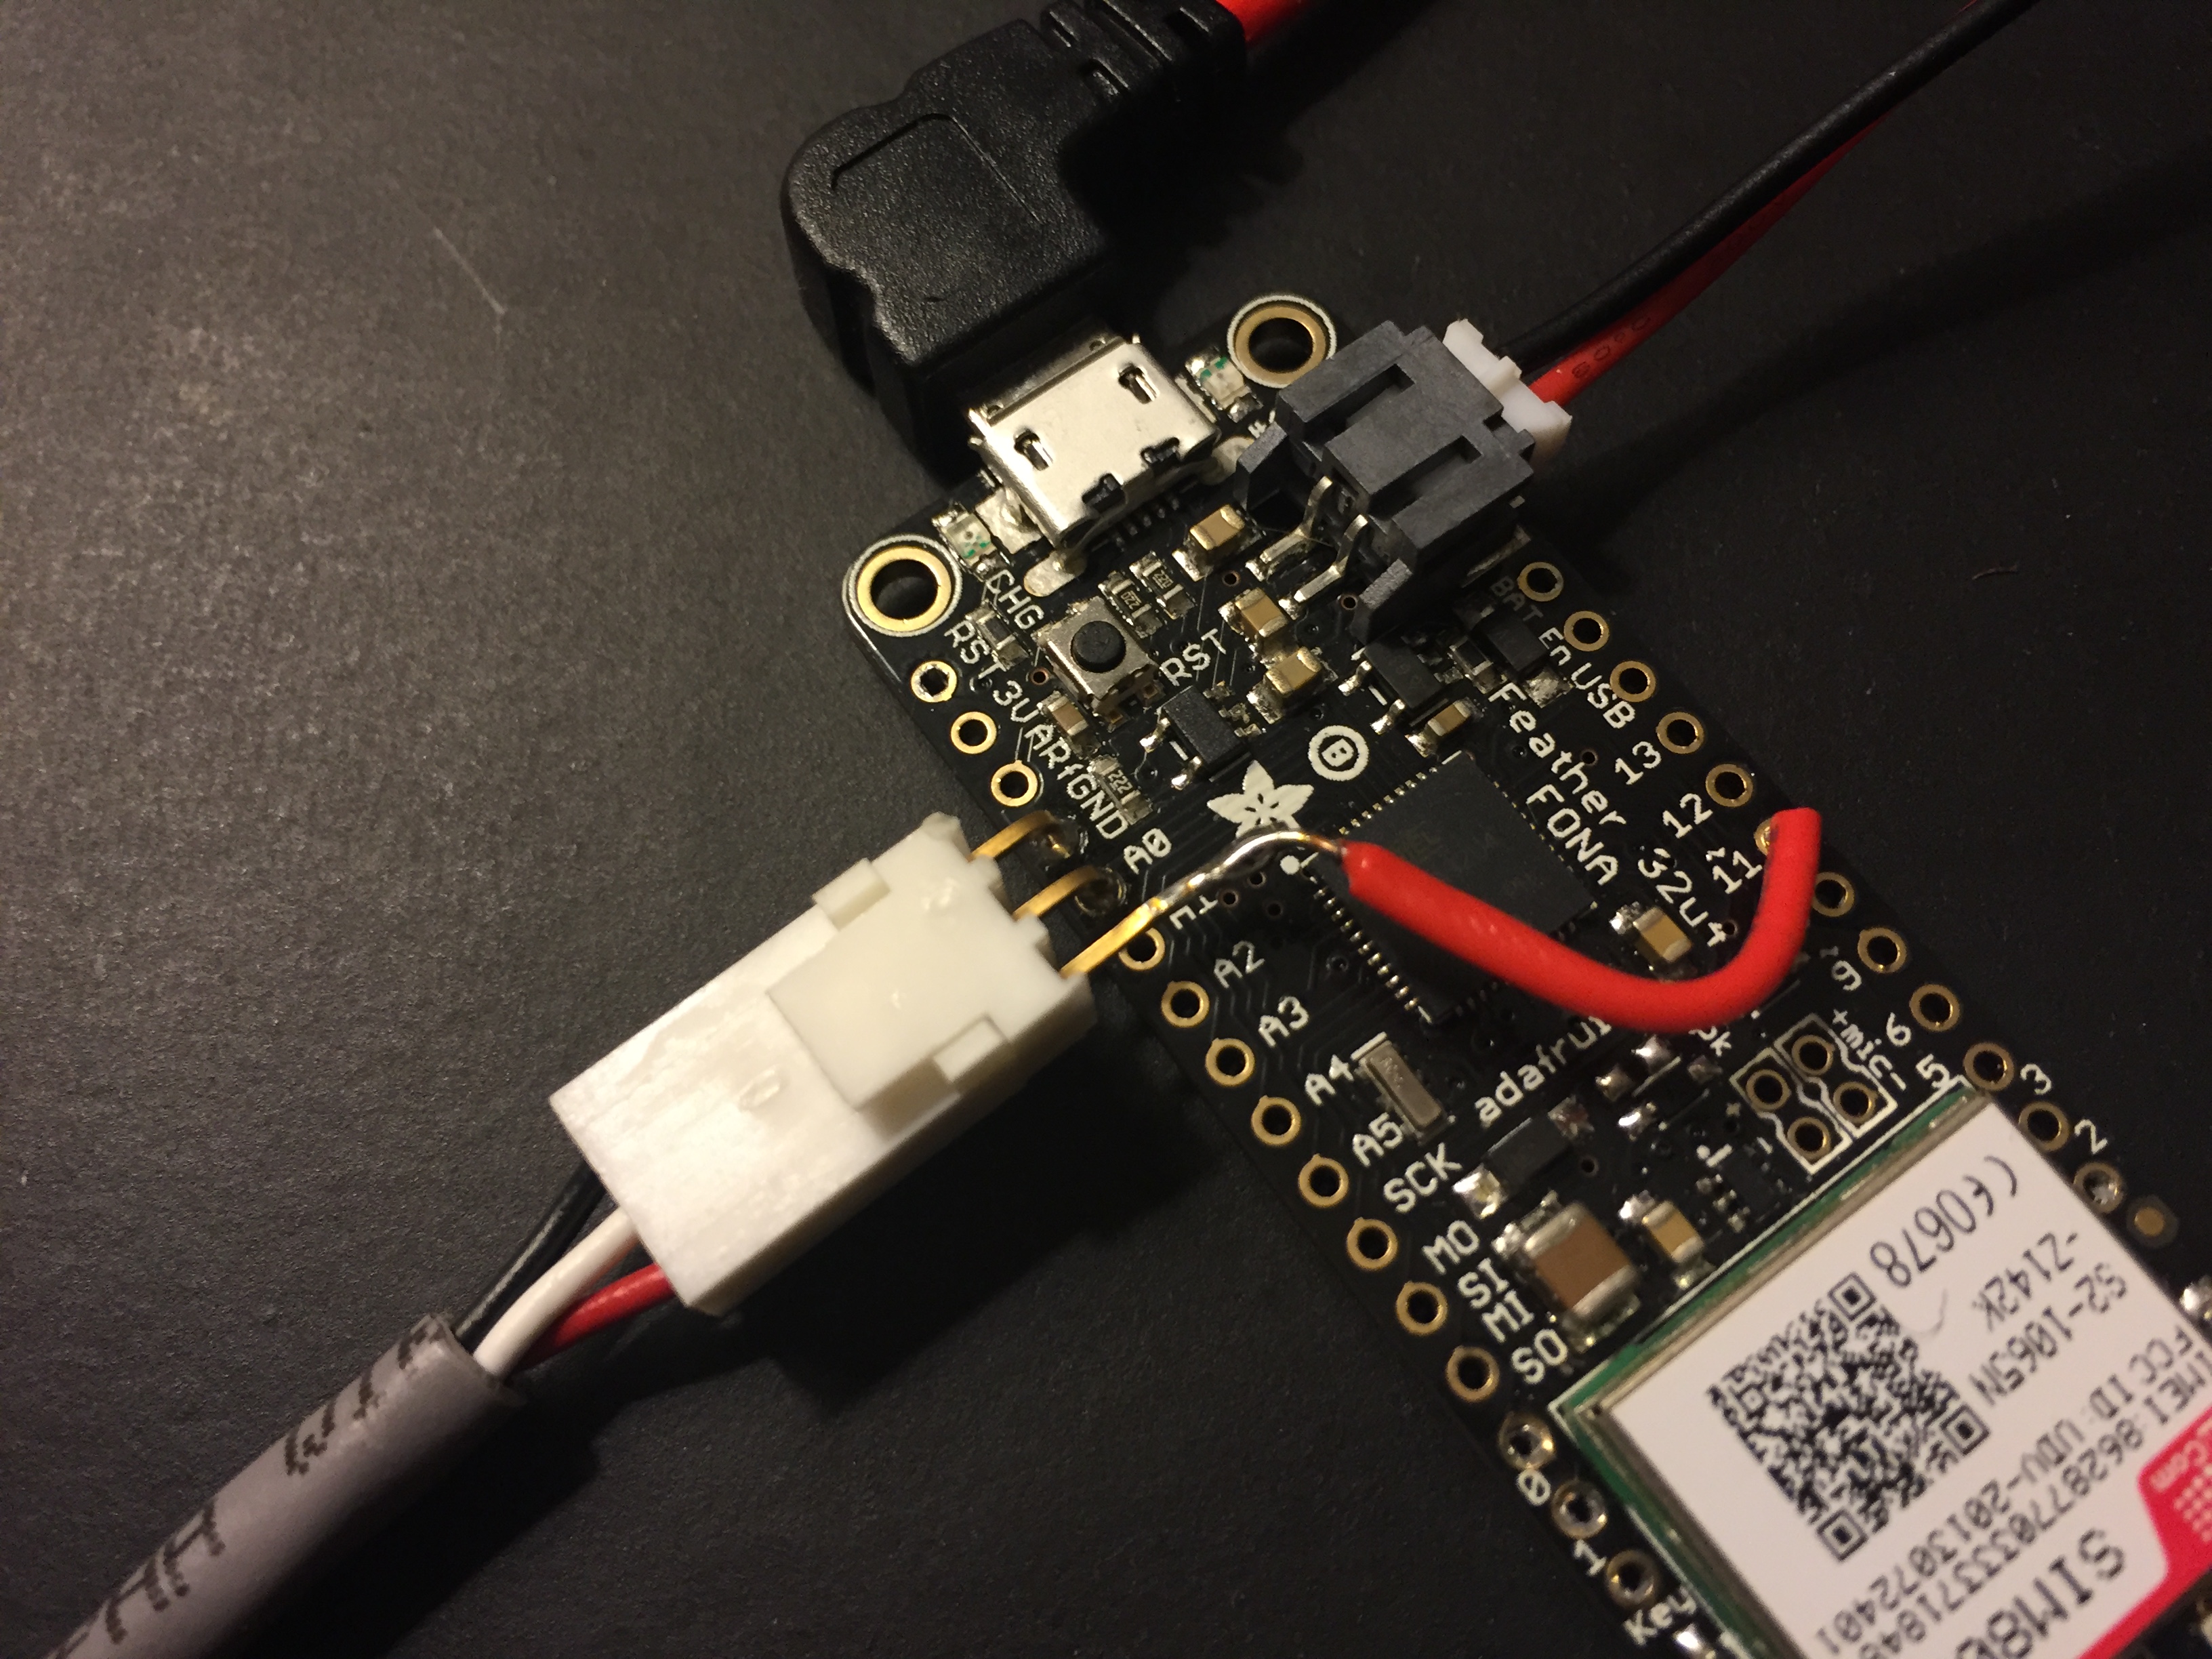
Close-up of Adafruit Feather with connectorized temperature probe

Board wiring diagram
Measurement and Transmission
Here’s how the water data is sent to the cloud.
When the device starts up, either after regaining power or a manual software reset, the microcontroller (programmed with Arduino IDE) sets the ADC reference voltage to 3.3V and establishes connection to the cellular data network. Following the initial setup sequence, it repeatedly loops through:
- Connect to Adafruit’s MQTT server.
- Measure the water’s temperature.
- Publish value to the Adafruit IO datafeed via MQTT packet.
- Disconnect from Adafruit’s MQTT server.
- Send the device to sleep.
- Wake up the device from sleep.
- Check if the network connection if still active. If no signal is found after a couple minutes, the device sleeps for an hour and then resets to the startup sequence.
Power and Sleep
The device should sleep for most of the day, with periodic spurts of high activity.
The startup sequence and measurement acquisition are assumed to draw negligible power in the grand scheme of things, and the sleeping power draw is estimated at 34 mW (micro: 6 mA @ 5V ; fona: 1 mA @ 3.7 V). MQTT transmissions are estimated to consume about 1 mWh (300 mA peak), so waking up and sending one every 20 minutes should bring the power consumption with an active cell network to ~37 mW. If no network signal is found, periodically waking from sleep to scan for the signal (an energy-intensive process) brings the rate up to ~39 mW.
These figures suggest the daily power burn is about 1 Watt-hour, so running from a fully-charged 4 Amp-hour, 5-Volt battery pack with zero recharging could ideally run this system for 20 days. These calculations are theoretical and based on Adafruit’s power consumption page for the Feather board, Martin Harizanov’s post on power saving with the ATmega32u4, and SIM800H documentation.
In an actual test of the device, which ran off a full charge (sans energy input) making transmissions at 13 minute intervals, it ultimately survived for 7 days which means we need to generate about 2 Watt hours a day to keep the system running.

Development test setup in ice water
Adafruit IO
The Arduino code that’s programmed to the Adafruit Feather’s microcontroller contains definitions for the Adafruit server address and user keys. Here’s a tutorial for getting started with Adafruit IO.
Data is posted to a feed on the Adafruit IO browser app. If you choose to make your feed public, it can be downloaded and analyzed by others.
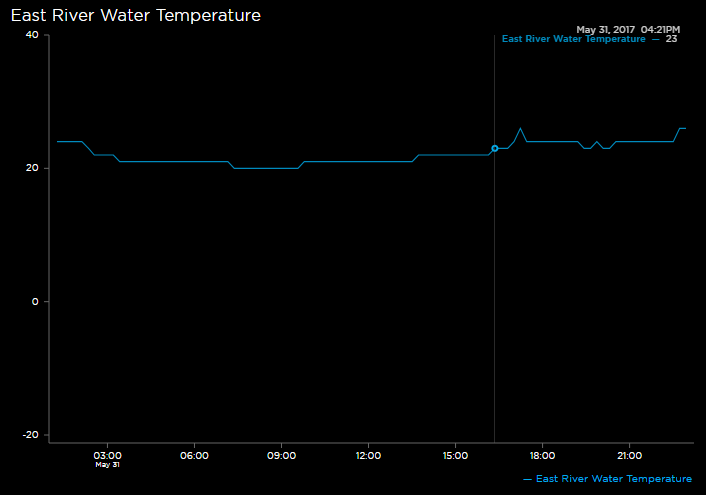
Adafruit IO water temperature feed
Next Steps
Moving forward, the plan is to incorporate additional water quality probes to this system and install it in Brooklyn’s East River to track the river’s health. With more data feeds, reliability and lifespan will become even more important considerations. Aside from ensuring the data streams remain active, additional sensors will increase the energy demand from measurement and transmission. Weatherproofing the device will also be an interesting challenge, because believe it or not, electronic components don’t enjoy salt water baths.
Stay tuned for the next update!
Leave a Reply