DIY: Waterproof Case for Solar Powered Projects
This post outlines the steps necessary to build your own waterproof case for solar Arduino (or Raspberry Pi) projects that you want to leave outdoors. We’ve already done several posts about making simple waterproof cases for batteries and personal electronics, so feel free to consult those if you won’t be working with microcontrollers and sensors outdoors. If you’re new to solar powered microcontroller projects, check out our guide to picking the right gear for solar Arduino projects.
Waterproof Case for Solar: Why?
The challenge associated with making a weatherproof box for Arduino projects is that you’ll be using sensors that are waterproof, but batteries and Arduino boards that are not. So how do you leave the sensor exposed to the elements to do it’s job, while simultaneously protecting the sensitive electronics? How would you supply power from inside the waterproof case to the sensor while relaying the information from the sensor back to the Arduino? Great questions, let’s begin!
As an example, we’ll be highlighting the box used for the Solar Powered Air Quality Sensor, which requires 6 wires going in and out of the case (two power wires going into the case from the panel to charge the battery, two power wires going out of the case to operate an air quality dust sensor, and two data wires going back into the case from the sensor to relay information to an Arduino). The wires need to be insulated to travel into the case without compromising the integrity of the water-tight seal. Do we really need to make 6 different entry points?
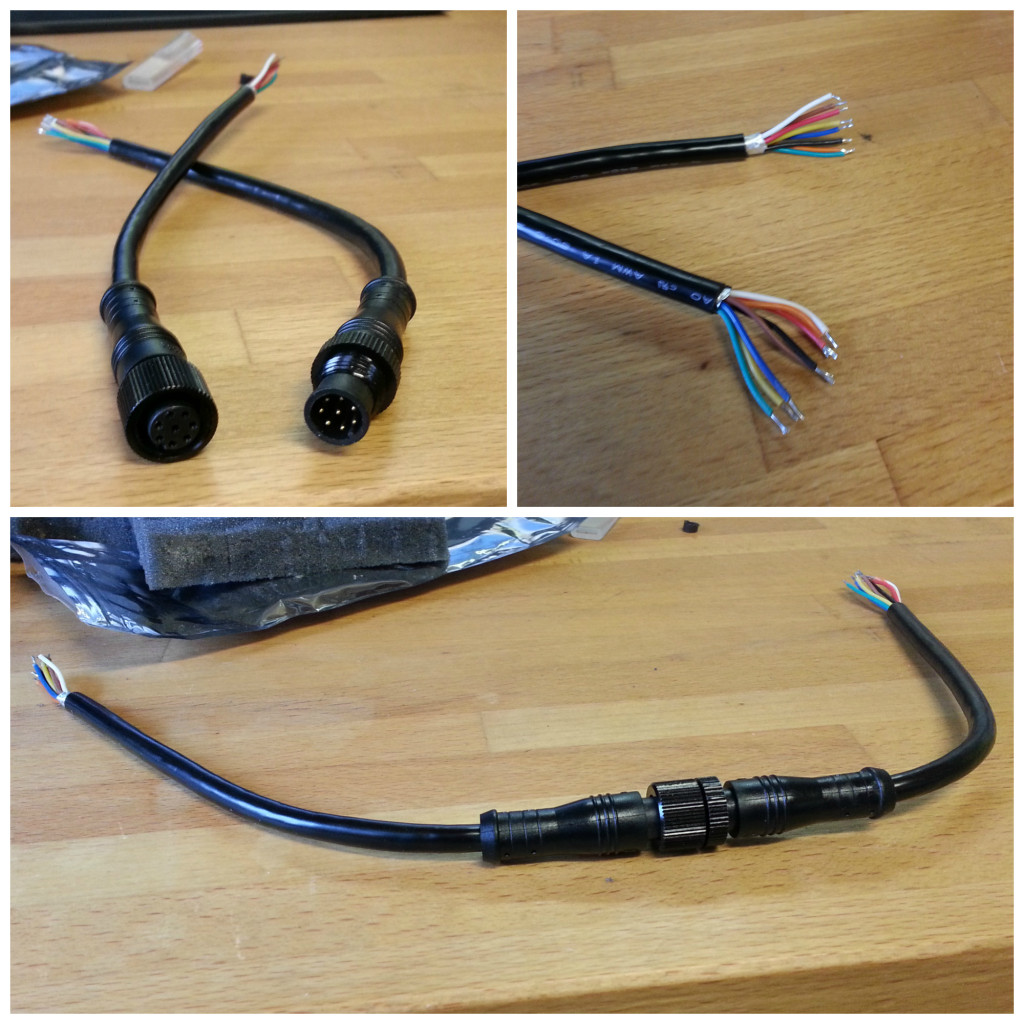
The solution involves building a single water-tight entry point for all of the power and data lines to travel in and out. This is accomplished using a single multi-pin waterproof connector that can support both power and data lines. For the last two microcontroller projects we’ve done here at Voltaic (the air-quality dust sensor and solar powered weather station) we used an 8-pin male/female waterproof connector with a waterproof plastic cable gland.
Step 1: Assemble Equipment
Project Materials:
Project Tools:
- Power Drill
- Soldering Iron
- Heat Gun, hair dryer, or handheld lighter for heat
- Epoxy, Silicone, Hot Glue, or other adhesive
- Knife, scalpel, or scissors
- Heat shrink tubing
Step 2: Make a Plan for the Internal Layout
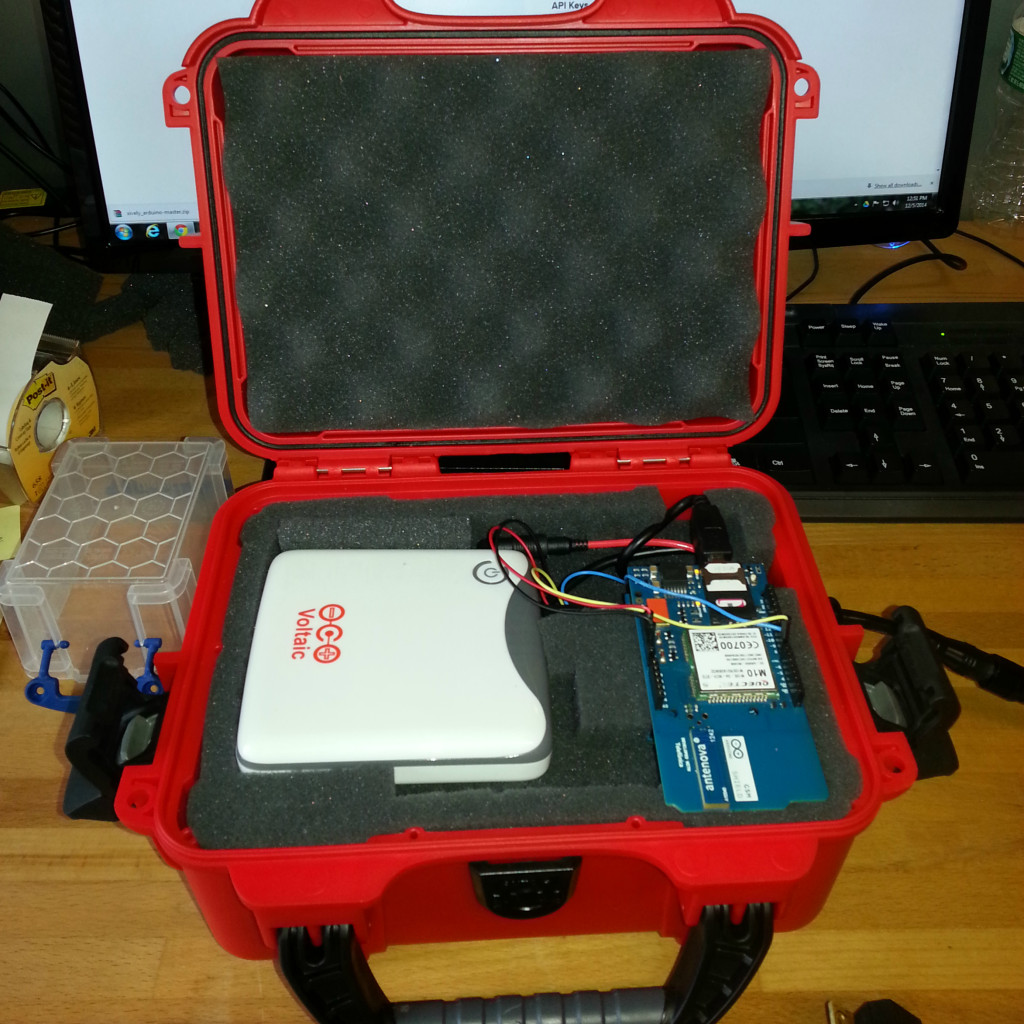
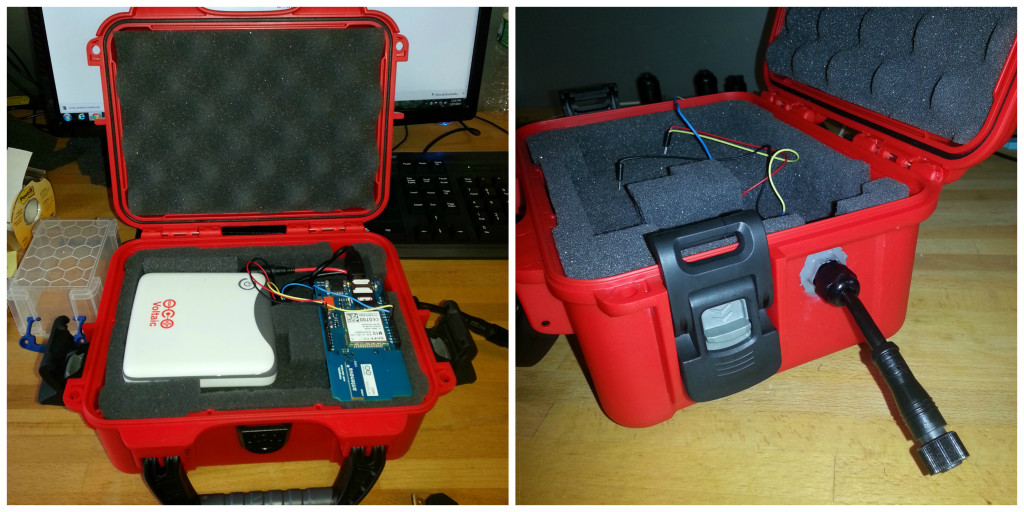
The Nanuk 904 case is an excellent weatherproof box to use in rugged outdoor environments. It comes with a solid foam insert that can be customized to provide a snug fit for all of the devices you want to store. Of course you could always remove the foam insert altogether and have a hollow case, but customizing the foam doesn’t take too much effort so feel free to give it a try.
Begin by laying out all the items you want to store in the case on top of the foam to see how they’ll all fit together. There are small square cut-outs in the foam that are very easy to remove if you have a sharp knife. If possible, keep at least one layer of foam around the perimeter of the box so the electronics are cushioned against hitting the side walls.
Keep in mind where you’ll want the hole drilled in to the case and how that will relate to the items inside, as the first few layouts you come up with may not allow for a convenient hole location. You’ll want to pick a location for the hole that is completely flat so you’ll have a tight seal with the plastic gland.
Once you’ve decided where you want the items to go, remove all of the foam necessary for those items. Remove foam deep enough into the case so that the top of the items are right at the surface of the original foam, that way they’ll be cushioned from the top as well. Remember to cut out room for the wires between the devices too.
Step 3: Drill into the Case
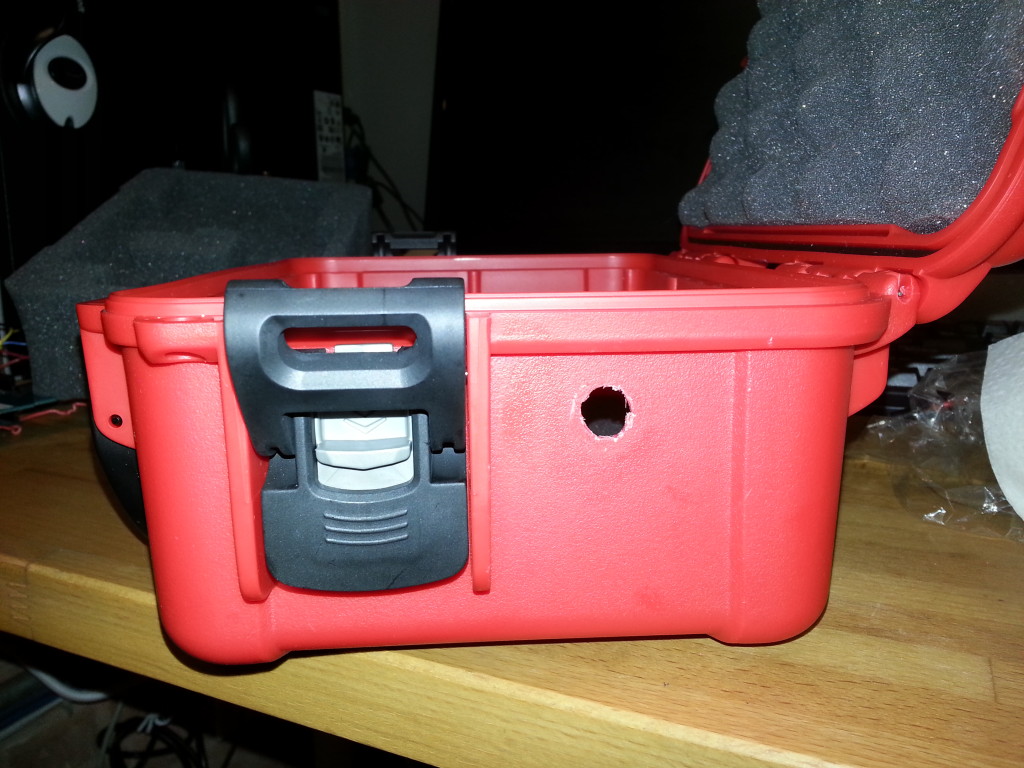
Mark a flat spot on the outside of the case that you want to drill into. Wires will eventually flow through here, so pick a place that allows the wires to flow towards the right electrical device as conveniently as possible, so that they aren’t bent in strange directions if they don’t have to be.
A 7/16″ drill bit would be ideal, but if you don’t have that you can approximate it with the drill bits you do have. It doesn’t need to be a perfect circle, as the epoxy or glue will make up for any imperfection when creating the seal. Just make sure it’s large enough to fit the gland through while having a snug fit on it.
Step 4: Attach the Plastic Gland
A plastic glad is a great tool for creating an watertight seal when prototyping projects because it gives you the flexibility to change your mind and move things around. Don’t buy a plastic gland until you know what connecting wire you’ll be using, that way you can select a gland with an appropriately sized range of inner diameters to fit the wire.
There are 4 main parts that work together to create the seal, including a rubber o-ring (not pictured). The central piece in the middle is what the large wires flow through, the “fastening nut” on the right of the middle picture is what secures the gland to the case from the inside, and the larger “tightening nut” on the left is what tightens the gland around the wire to create a water-tight seal.
Step 5: Apply Sealant
Before you screw the gland onto the outside of the box, be sure to place the rubber o-ring in-between the gland and the case. This helps to create a water-tight seal between the gland and the case, so be sure to tighten the gland down as much as necessary to make sure water can’t slip past the o-ring.
Depending on the quality of the hole you drill and the flatness of the side wall of your case, you might not create a water-tight seal from the o-ring alone. There may be some small imperfections that allow drops of water to creep in through the threads of the gland that seep into your case. This can be easily prevented with any good sealant, such as epoxy or a hot glue gun or sealing silicone, all of which can be picked up at a local hardware store.
Question: If the gland isn’t water-tight, why use it at all? Why not use only sealant that attaches to the wire itself?
- Great question. The benefit of the gland is that it grants you far more flexibility with modifying the cable that goes into the case. You can push the cable in or out to get the best fit with the other electronics as you change things around, or you can swap it out altogether with another cable if you want to reuse the case for another project. Though if you don’t plan on reusing the case and you don’t need to pull out or rearrange the cable for any reason, feel free to ignore the gland and drill a hole only large enough for the cable, then use sealant over the cable itself at the entry point to make it water-tight.
Put a full ring of your sealant around the edge of the case where it connects with the gland. Tighten the gland around the sealant and make sure it completely covers the base of the gland. Give it sufficient time to dry and set into place before twisting it around or attaching the tightening nut around a cable.
Step 6: Wire Preparation
Now that your case is ready, you’ll need to prepare the wires on the inside and outside of the case. This involves soldering and heat-shrinking tubes, so be sure to make a plan before you begin! You’ll need to decide how to color-coordinate the wires of the 8-Pin connection cable, and how you’ll insulate the wires from each other so they don’t short out (remember to put them on before you begin soldering!).
Important points to remember:
- It doesn’t matter if the male or female side of the 8-pin connector is connected to the case or on the outside
- Maintain the same wire color coordination on the inside and outside of the case
- Place the shrink wrap tubing on each wire BEFORE you begin soldering, and make sure it’s far enough away from the exposed leads that when they heat up, they won’t shrink onto the wire before you want it to
- Place the tightening nut on the cable BEFORE you feed wires through the plastic gland and solder them
- Insulate the 8-pin connector where the exposed wires connect to the sensor and power wires, that way water can’t seep through the cable on the inside
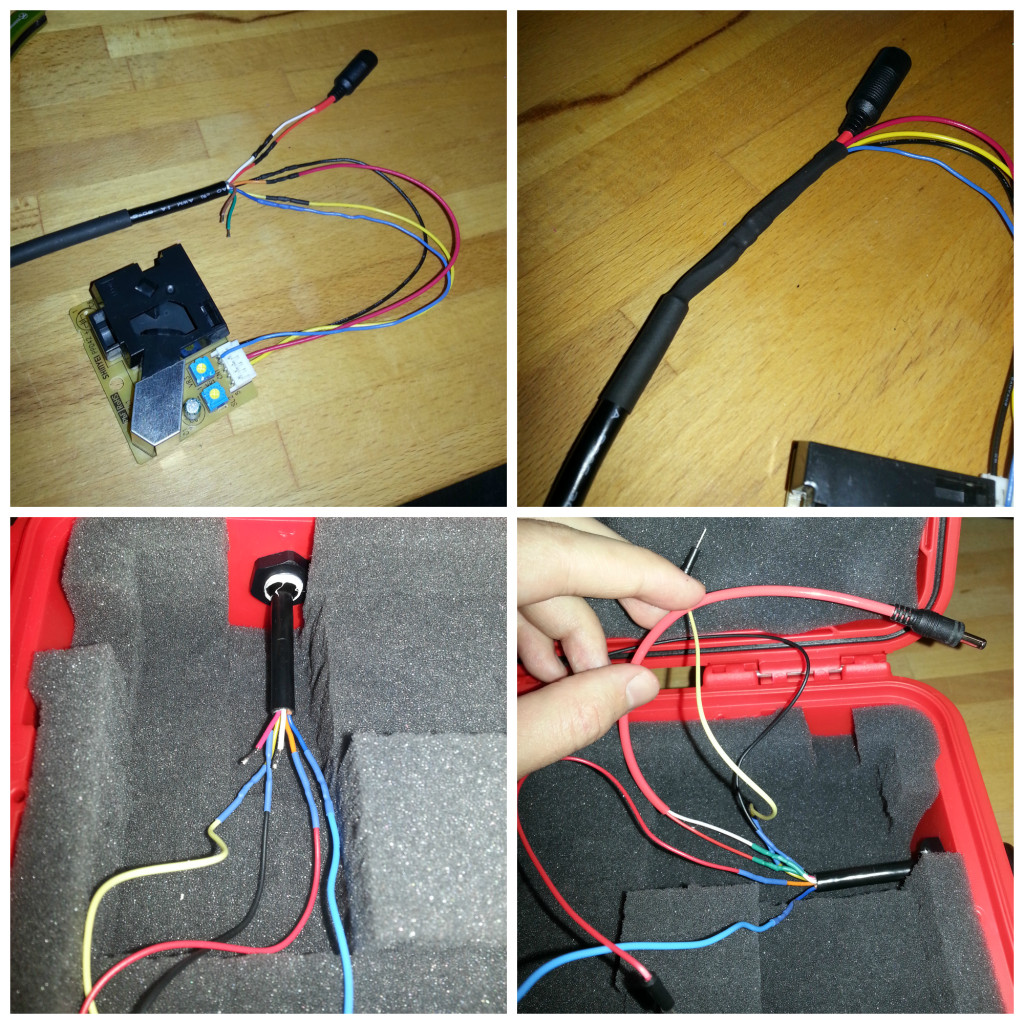
Sensor Wires: All four wires coming from the sensor need to be soldered to individual wires of the 8-Pin connector (as you can see from the upper-left picture). Luckily the colors of the sensor wires matched the colors of the connector, so we maintained that color theme to avoid confusion. Each wire needed it’s own insulation to prevent the data signals from being disturbed and prevent a short circuit. Try to do as much soldering as possible before the cable is fed into the plastic gland, that way it will be easier to control before it’s in a confined space inside the case.
Solar Wires: We need to attach the power wires of the solar panel to both the male and female sides of the 8-Pin connector to recharge the V44. While you could cut the adapter plug off of the panel cable itself and hack those wires to the connection cable, we chose instead to install a waterproof female port from one of our extension cables so that we wouldn’t have to modify the panels at all. This gives us more freedom to change the size of the panels if we want, or use additional extension cables if we want to separate the panels from the case. Likewise on the inside of the box, we soldered a generic power extension wire so that we could attach any adapter we want and have the freedom to change batteries in the future. The power cable for the battery wouldn’t fit through the plastic gland (as you can see, it’s missing from the lower-left picture), so it needed to be soldered after the cable was fed through the entry point.
Finally when all of the outside wires are soldered and insulated individually, use one large insulating shrink-wrap tube around the collection of wires and place a little extra sealant where they all join together so that water can’t enter into the inside of the cable.
Step 7: Test Your Work – Full Submersion Test
Once all the cables are soldered and fed through the plastic gland, you can screw on the tightening nut as tight as you can with your fingers (and maybe a little bit more with a wrench if you have one) and you’re finished! Any good engineer will test his work before he puts it out in the wild, and the best way to do that is a full submersion test. Empty the case and insulate the top of the 8-pin connector so it doesn’t get wet during the test, then place the case completely under water for a significant period of time (10 minutes or more). If no water seeps through to the inside of the case, you’ve done a great job!
Confirm that the power and data wires are working properly, and you’re all done.
Result
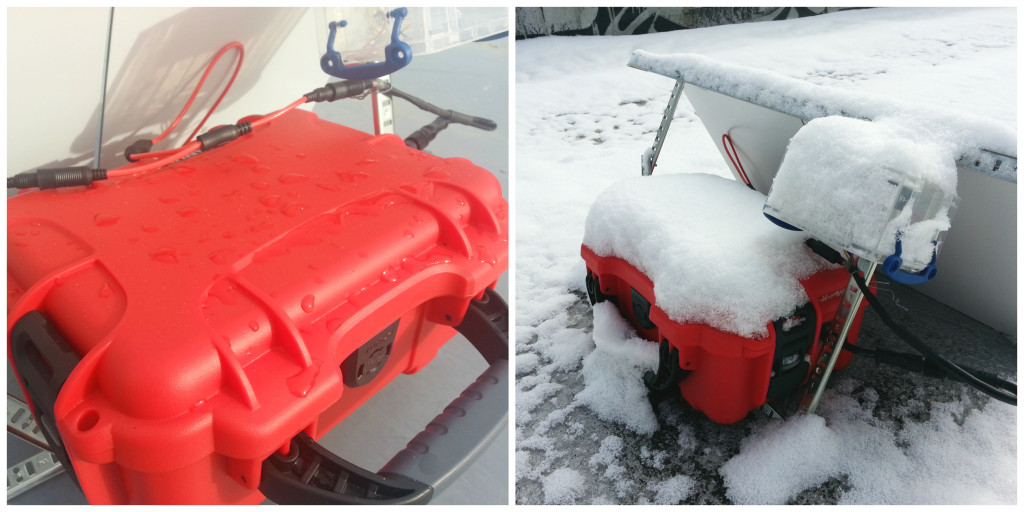
After combining this case with two 9 Watt solar panels, we placed it up on the roof to start recording air pollution. Over the last few months it’s experienced heavy rain and several inches of snow while keeping the equipment on the inside perfectly dry.
If you have any questions about how to use a waterproof case for your specific setup, be sure to give us a call or send us an email. We’d be happy to help you get your microcontroller project up and running.

