Note: This project was performed with an earlier version of the Voltaic solar panel. Voltaic’s newer 16 Watt panel works for this application – the only difference is that the output plug from the current panel is 3.5×1.1mm not 3.5×1.3mm. We’d recommend using the 1 panel circuit box to receive the solar panel output.

The 15 Watt Panel from Voltaic Systems is a small solar panel ideal for road trips, camping, and festivals. The combination of this panel and battery can produce enough energy to easily charge a laptop / cell phone / ipod, inflate an air mattress, power a boom box, recharge AA batteries, run lights and charge power tools.

The panel itself is compact (11″ x 15″) and affordable at only $149 ($10 per watt). With an additional $87 in accessories, the panel can easily charge durable sealed lead acid batteries.

Parts
1 15 Watt Panel ($149)
1 12V / 144Whr battery ($40)
1 Insulated Clamps ($1.50)
1 Charge Controller ($28)
1 1.3mm (I.D.) Power Jack (<$1) – see below
Red/Black Hookup Wire ($5.49 ea)

Step 1: The Plug 1.3mm I.D
This is what the plug looks like. You can buy these for $0.35 on-line. Be careful. Radioshack wants to sell you a similar plug for $5.50. This is what will receive the male solar panel connection.
Step 2: Solder Leads onto Plug
Note the positive (red) lead is at the rear center and negative (black) is dead center.
Step 3: Solder Insulated Clamps
You will need the following tools.
– Screwdriver
– Soldering Iron
– Wire Strippers
Step 4: Connect to Charge Controller
The female plug we soldered for a solar panel receptacle and the insulated clamps can now be connected to the charge controller.
Female Plug –> charge controller (Solar Panel In)
Clamps –> charge controller (Battery Out)
Step 5: Battery Voltage Check
Use a multimeter to check the voltage of the battery before plugging it into the charge controller. My battery is very low reading 11.9V.
Step 6: Confirm PV Panel Voltage
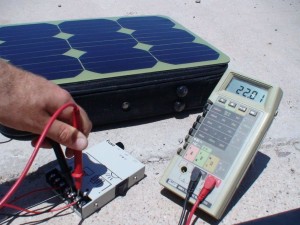
You can see that I am measuring the panel voltage coming into the charge controller. I just want to see what the panel is producing before we give it a battery load.
solar charging car battery
Step 7: System Charging
Both the battery and panel can be connected to the charge controller and the charge controller switched on. Using a multi-meter on the battery you should see a voltage increase.
Step 8: Bigger Batteries
Any 12V battery can be charged with this system. Big ones, little ones, etc. The big batteries will just take longer. In full sunlight a these panels produce about 15W. On a sunny day you might have five to seven hours of peak sunlight that is about 100W. A car battery can hold about 1000W so you are looking at ten days to charge that size of battery if it was drained.A trick I like to do when camping is bring a small solar panel and multimeter along with me. Then make use of the car battery (with small inverter) in order to power my boom box, air mattress, cell phone, AA batteries, GPS, and lights. As long as the car battery has a trickle charge from the solar panel and I avoid draining it below 12.3V I can reliable start the car. You can see me charging a old car battery here with attached multimeter to monitor the voltage.
solar car charger

3 Responses

  1. James

    Would be nice if the pictures were re-uploaded! I’m looking to do this setup with the Voltaic 17 Watt panel in my truck, for interior lighting and electronic charging.

    Reply
  2. santhana

    hi. good day.. i was planned to used solar panel to charge my car. i want to know the total cost to build up a solar panel system to charge car battery. for ur information im from Malaysia. (asia Country)

    Reply

Leave a Reply

Your email address will not be published.

This site uses Akismet to reduce spam. Learn how your comment data is processed.